Table of Contents
Simple PLC Simulation
Introduction
PLCs can be “simulated” in MIStudio, MIX and TransSECS Devices deployments so that the software may be tested if the PLC is not present.
Setup
There are three parameters that used to set up this simulation, one of which is optional (can be left set to its default value), the java tmp directory (see below), where the simulator files are written. These parameters are added to the command line which runs the application, either the MIStudio.conf, MIX.conf, run.bat or run.sh for TransSECS deployments. Examples of these deployments and configurations will be shown below.
These three parameters are:
java.io.tmpdir - this can be left at its default, which is the system's tmp (temp) directory and is OS dependent. Optionally, if set to a different location for the simulation files then several ErgoTech applications may share the same “simulation” in a controlled manner (see examples below under Examples).
Note: be sure that the directory you use for the java.io.tmpdir setting exists on your harddrive before running the configuration.
vib.sharedplcsimulation - this is mandatory and is set to “true”
XXXXXXXX.simulate - this is mandatory and XXXXXXXX is the name of the device server to simulate, and is set to “true”
TransSECS Devices Example
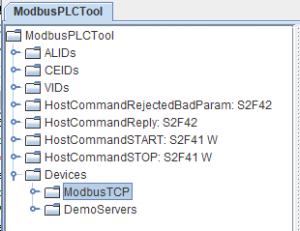
This example uses the ModbusPLCTool project to simulate the Modbus PLC. After building the deployment to the ModbusPLCToolDeployment directory, the run.bat or run.sh file can be modified to set up the simulation.
The name of the device server is “ModbusTCP”. For the purpose of sharing registers between this application and an MIStudio project (example below), we will use a directory called “C:/PLCShare”.
The run.bat file will be edited in Notepad++ or another text editor. The line that says:
java deploy.ModbusPLCTool.EquipmentController
will be changed to add the three parameters to establish PLC simulation, as follows:
java -Djava.io.tmpdir=C:/PLCShare -DModbusTCP.simulate=true -Dvib.sharedplcsimulation=true deploy.ModbusPLCTool.EquipmentController
When run.bat is used to start the application, you will see a few files generated in C:/PLCShare (the number of files depends on the register types/address space used for the device server and is likely to be dependent on the type of device server).
Using ErgoTechConfiguration.properties for Device Simulation
Using the parameters above, instead of editing the run script, you can add these parameters to ErgoTechConfiguration.properties. Add a section starting with a comment such as:
#for simulating devices, remove if not simulating
java.io.tmpdir=C:/DeviceSim/GEMTool
OmronFins.simulate=true
vib.sharedplcsimulation=true
if the example above, the device server OmronFins would be simulated
MIStudio Example
MIStudio can be set up to use the plc device simulation also. Three parameters can be added to MIStudio.conf, in the section which sets up the command line parameters passed to the JVM.
Make a backup copy of the MIStudio.conf file and open MIStudio.conf in a text editor such as Notepad++.
Find the section headed “# Java Additional Parameters”. Go to the bottom of this section and add three lines, wrapper.java.additional.9 to wrapper.java.additional.11 (note that the numbers must be consecutive and that for this example the last number existing in this section is “8” at the time of this documentation).
...
wrapper.java.additional.9=-Djava.io.tmpdir=C:/PLCShare
wrapper.java.additional.10=-DModbusTCP.simulate=true
wrapper.java.additional.11=-Dvib.sharedplcsimulation=true
...
When you start MIStudio the simulator for a Modbus device called “ModbusTCP” will be set up to simulate.
Note: Do not toggle MIStudio into “LIVE” mode to use the shared PLC simulation. Leave this at the “SIM” setting.
To test the shared PLC simulation with the TransSECS Devices example above, start a new MIStudio project. In the Design Window add a SwingTextField and an Annunciator, copy both to the Diagram Window. In the Diagram Window, add a Modbus TCP Device Server and rename it to “ModbusTCP”. Configure the ModbusTCP Server to use “localhost”. Now add one Modbus 4X Int component to the Diagram Window, and select “ModbusTCP” for its device server and set the timebase to 1.0. Set the register address to 1 – this is the register used for the “heartbeat” in the TransSECS Devices example.
Connect the SwingTextField to the input of the Modbus4XInt component, and the output of the Modbus4XInt to the Annunciator.
Open the Test Frame in MIStudio and enter “6” into the SwingTextField. This will write a “6” to 4X register 1, which is the heartbeat register in the TransSECS Devices example. If you are running the TransSECS Devices example from above, you should see the heartbeat value “6” printed every second.
MIX
MIX is set up in the same way as MIStudio. Edit the MIX.conf to add the three parameters as for the MIStudio example taking care to add the java.additional parameters in numerical order.
Alternatively, in the same way that ErgoTechConfiguration.properties is edited in the example above, mix.properties can be edited to add a section to define these properties instead of editing MIX.conf

